Recently I've been taking another look into how I render light volumes, I don't get nearly as much time as I'd like to work on this stuff these days but I've hit upon some improvements so I thought I'd write it up.
The two primary issues I've come across with light volumes are light leaks and ensuring that the light volumes are padded so as to avoid issues with linear sampling. This post goes into a bit more detail about the issues I encountered and provides a bit more background to this post.
In a nutshell though, sampling a 3D scene at sparse regular intervals doesn't tend to yield very good results. Frequently the scene is sampled from behind geometry, causing light leaks and other issues.
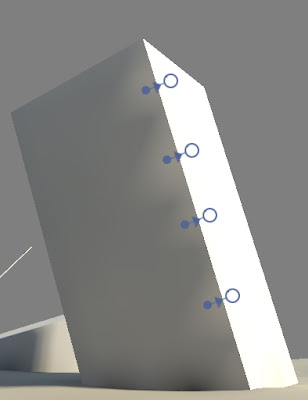
My previous solution used a bunch of raycasts to determine the best new location for each sample point whenever there was scene geometry close by. Whilst this was an improvement it wasn't always effective and often required extra geometry to prevent light leaks. Another common problem occurred around hard geometry corners, with the new sample point often ending up on one side of a corner when really it needs to sample both sides. This tended to look quite bad in situations where the lighting differs substantially on either side of the geometry edge. The image below hopefully makes the problem clearer.
My previous solution used a bunch of raycasts to determine the best new location for each sample point whenever there was scene geometry close by. Whilst this was an improvement it wasn't always effective and often required extra geometry to prevent light leaks. Another common problem occurred around hard geometry corners, with the new sample point often ending up on one side of a corner when really it needs to sample both sides. This tended to look quite bad in situations where the lighting differs substantially on either side of the geometry edge. The image below hopefully makes the problem clearer.
Problem: In this case the issue shows up as a sawtooth pattern on the darker side of the object.
Cause: The sample point can only be in one place at a time?
A solution: Split the sample point
A solution to this problem is to just split the sample point in cases like this. Because the lighting is evaluated and stored as the average amount of incoming light from six basic directions (+X,+Y,+Z,-X,-Y,-Z), we can separate the sample locations for each of these base vectors. If the light volume texel contains geometry then each sample direction moves to the closest face with the most similar geometry normal. If no similar normal is found then the sample points simply move to the closest face, regardless of it's geometry normal.
So this works pretty good but we're still left with the problem of linear sampling causing further light leaks. In other words, samples that don't contain geometry can still contribute their lighting information.
Previously I'd just use a very wide search radius for each sample, enough to take this effect into account, but this caused further problems as it wasn't always easy to predict where a sample would end up. To solve this I've implemented a post render padding stage, very similar to how light maps are padded, only in 3 dimensions. The padding process looks for texels that contain no geometry but that have neighbours which do. These "empty" texels are then set to contain the average lighting value of all there geometry containing neighbours. This has the effect of padding the light volume and removing the remaining light leaks.
Stepping through these issues and solutions using a simple scene we have:
A) No Fixes.
No attempt to fix the sample locations or pad the light volume. Light leaks are a big problem here.
B) Sample points fixed.
Fixing the sample locations certainly improves things, the point sampled version barely displays any light leaks but we still hit problems when using linear filtering.
C) Sample points fixed and volume padded.
Finally, padding the light volume solves the remaining light leak issues and smooths the overall result.
That example scene was pretty simple so there are some examples of more complex scenes below. Click for larger versions.


